Minishift notes

Background: attempting to allow external hosts on the same network as the KVM host on which minishift VM is running to be able to access the minishift web UI and optionally via SSH. In this example, 192.168.42.62 is the IP assigned to minishift after starting it, and 192.168.10.0/24 is the IP range of the network on which the KVM host is running.

On my KVM Linux host, installing libvirtd had created the virbr0 bridge. Subsequently setting up minishift setup a second bridge named virbr1 to which the vNIC assigned to the minishift VM is slaved. Interestingly enough, the minishift VM is then given 2x interfaces with one attached to each bridge (virbr0 and virbr1). In the minishift VM, the default route is assigned to the interface (e.g., eth0) attached to the first bridge (virbr0) with IP 192.168.122.30, even though when minishift starts, it displays a URL with the IP address (192.168.42.62) assigned to the interface connected to the second bridge as the way to access the minishift web UI. This works fine as long as you are attempting to access the URL from the KVM host, but won’t work without some extra steps if you want to access the minishift UI from an external host.
wlp5s0 is the “public” interface on my KVM host.

Setup and start minishift (equivalent to RedHat CDK if you have the right subscription):
itababa@itamint:~$ sudo apt update -y
itababa@itamint:~$ sudo apt install qemu-kvm qemu-system qemu-utils python3 python3-pip libvirt-clients libvirt-daemon-system bridge-utils virtinst libvirt-daemon virt-manager cpu-checker -y
itababa@itamint:~$ usermod -aG libvirt $(whoami)
itababa@itamint:~$ newgrp libvirt
itababa@itamint:~$ sudo systemctl enable libvirtd
itababa@itamint:~$ sudo systemctl start libvirtd
itababa@itamint:~$ sudo virsh net-start default
itababa@itamint:~$ sudo virsh net-autostart default
itababa@itamint:~$ sudo curl -L https://github.com/dhiltgen/docker-machine-kvm/releases/download/v0.10.0/docker-machine-driver-kvm-ubuntu16.04 -o /usr/local/bin/docker-machine-driver-kvm
itababa@itamint:~$ sudo chmod +x /usr/local/bin/docker-machine-driver-kvm
itababa@itamint:~$ curl -L https://github.com/minishift/minishift/releases/download/v1.34.3/minishift-1.34.3-linux-amd64.tgz -o minishift-1.34.3-linux-amd64.tgz
itababa@itamint:~$ tar xf minishift-1.34.3-linux-amd64.tgz
itababa@itamint:~$ sudo cp minishift-1.34.3-linux-amd64/minishift /usr/local/bin/
itababa@itamint:~$ minishift start

NOTE: the “minishift start” command will display the minishift web UI at the end of its run.
Reference: https://docs.okd.io/3.11/minishift/getting-started/setting-up-virtualization-environment.html

Settings needed on the KVM host:
- configure the KVM host to redirect connections to it on 8443/tcp to the minishift host (192.168.42.62). Optionally redirect 2222/tcp to the minishift host as well:
iptables -F
iptables -F -t nat
echo 1 > /proc/sys/net/ipv4/ip_forward
echo 1 > /proc/sys/net/ipv4/conf/virbr0/proxy_arp
echo 1 > /proc/sys/net/ipv4/conf/virbr1/proxy_arp    (required so that the host can answer when the minishift VM tries to find the ARP of external hosts, otherwise the minshift will not respond to any connection attempts)
iptables -t nat -A POSTROUTING -o wlp5s0 -j MASQUERADE
iptables -t nat -A PREROUTING -i wlp5s0 -p tcp --dport 8443 -j DNAT --to-destination 192.168.42.62:8443
iptables -t nat -A PREROUTING -i wlp5s0 -p tcp --dport 2222 -j DNAT --to-destination 192.168.42.62:22
Settings needed on the minishift VM after it is running (execute "minishift ssh" to SSH into the minishift VM):
- NOTE: this whole section can be skipped if you choose to "DNAT" port 8443/tcp to the IP address on the virbr0 vNIC on the KVM host:
itababa@itamint:~$ minishift ssh
[docker@minishift ~]$
 sudo su -
[root@minishift ~]# ip a     (find the interface with the 192.168.42.x IP e.g., eth1)
[root@minishift ~]# ip route add 192.168.10.0/0 via dev eth1 (this is because the default route uses the NIC with 192.168.122.x IP and used by minishift to access the Internet)
[root@minishift ~]# ip route show
default via 192.168.122.1 dev eth0 proto dhcp metric 100
172.17.0.0/16 dev docker0 proto kernel scope link src 172.17.0.1
192.168.10.0/24 dev eth1 scope link
192.168.42.0/24 dev eth1 proto kernel scope link src 192.168.42.62 metric 101
192.168.122.0/24 dev eth0 proto kernel scope link src 192.168.122.30 metric 100
[root@minishift ~]#
NOTE: if you restart the minishift VM, you have to SSH into it again and re-add the route to the 192.168.10.0/24 network.

Settings needed on the external host:
In this example, I want to access the minishift web UI from a Windows system on my home network. You need to add a route to the minishift IP address using the KVM host IP as the gateway (using the command line):
C:\Windows\system32>route add 192.168.42.206 MASK 255.255.255.255 192.168.10.4

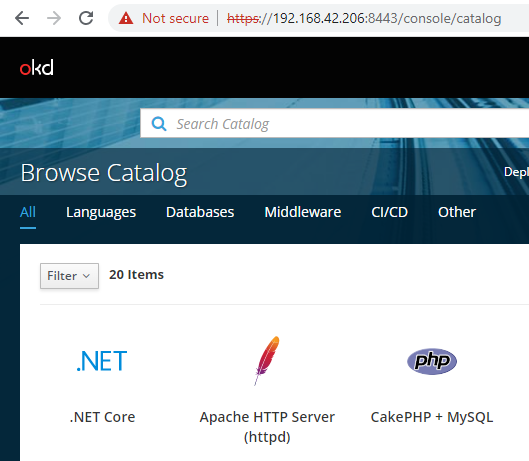
Launch a browser on the external host and go directly to https://192.168.42.206:8443/console/catalog

NOTE: if you attempt to login via https://192.168.42.206:8443/console , you will encounter this error/bug after entering your credentials (e.g., admin/admin)
Error: “Error. Invalid request. Client state could not be verified. Return to the console.”
Bug: “https://bugzilla.redhat.com/show_bug.cgi?id=1589072”
Found the solution (use the /console/catalog URL): https://github.com/openshift/openshift-azure/issues/236

after login with admin/admin credential

Other commands:
minishift delete –clear-cache (solution for error similar to: “Cannot start – error starting the VM: error getting the state for host: machine dies not exist-docker” when attempting to start minishift)
sudo virsh stop minishift; sudo undefine minishift; (might be needed if the “delete” command does not fix the issue)
sudo arp -a (on the KVM host to see the IPs of the minishift VM or SSH into the minishift VM)

– To restart the minishift VM (from the KVM host):
itababa@itamint:~$ minishift stop
itababa@itamint:~$ minishift start


Making Waara or Wagashi

Nigerians call it Waara or Wara, and Ghanaians call it Wagashi. Waara/Wagashi originated from the Fulani Northerners in both countries, and possibly other West African countries as well. Note that there is a Japanese sweet that is named Wagashi as well.

I have always thought it should be possible to make it here (in the USA), but always wondered what would replace the plant leaves used to initiate the curdling of the milk.

Recently it came to my mind again, and after a bit of Googling, I came across several sites and a few Youtube videos. As usual, some of the instructions are based on “feel free to go on until the spirit of your ancestors tap you on the shoulder and say stop.”

I ended up basing my attempt on two YouTube videos (links below).

Some notes:

I set the milk to boil on the low end of medium. After more than an hour, it didn’t quite start to boil, but when I could see a bubble rise here and there, I gave up and added the white vinegar, and stirred the pot briefly. The milk started to curdle almost immediately, and I think that separation lowered the boiling point of the separated liquid because it started to boil vigorously. In one of the videos, even though the lady used the word “boiling” she actually indicated a temperature of about 88F (32C) which is lower than the boiling point of water. As she said, getting a food-grade thermometer is likely a good investment.
Don’t forget (as I did) to add a little salt. Without salt, the Waara is almost tasteless.
One thing I noticed is that the Waara turned out quite hard. Though not sure why, but I suspect it may be due to one or more reasons – I boiled the milk too much or too long; or used too much vinegar; or squeezed too much of the fluid out of it.

Ingredients and equipment:
– 4 liters of whole milk from Walmart ($4). Each whole milk container is about 3.78 liter so you need a little more than one container.
– one cup of white vinegar (Walmart’s Great Value brand is $3). You can also use lemon juice as an alternative.
– a little salt to taste.
– a sieve ($7).
– Cheese cloth or something similar. Got one from Walmart for $3. After cutting off about 2 feet of it to use to squeeze the liquid from the Waara curds, I had to shake it vigorously first as some of the threads came off. Though it is labeled food-grade, I prefer not to eat too many of the threads :-).

Process:
– Put the milk in a pot and bring to almost boiling point.
– Add the white vinegar and stir (it will start to curdle immediately).
– leave it on the fire for another 15 to 20 mins.
– scoop out the curds into a sieve to get rid of the liquid.
– transfer the drained curds into a cheese cloth and squeeze out as much of the liquid as possible.

Pictures:

Boling the milk (add a little salt to taste).
White vinegar (I added 1.5 cups instead of one, maybe reason the curds turned out hard?)

after adding the white vinegar and stirring briefly.

About 15 minutes after adding the vinegar and turning off the stove.

Drained some of the liquid from the pot.

Waara curds in a sieve.

A little burnt milk at the bottom of the pot.

Waara curds in a sieve. The side plate is 8.25 inches in diameter for reference purposes.

Waara curds in a sieve. The side plate is 8.25 inches in diameter for reference purposes.

Food-grade Cheese cloth.

Wrapped the curds in a piece of cheese cloth.

Wrapped the curds in a piece of cheese cloth.

Using the milk container as leverage to squeeze out the fluid from the Waara curds in the cheese cloth. Feel free to wash your hands or put on gloves, and squeeze it through the cheese cloth 🙂
After squeezing out as much of the liquid as I could.

Waara (final product).

Texture is like hard cheese after a few hours.

Reference videos:
https://youtu.be/BrmtP91ufME
https://youtu.be/2gzsc0lN7HQ

INSTALL OSX VENTURA (13.x) ON QEMU/KVM (Linux)

NOTE: for educational purposes only

GUIDE: Used OSX-KVM with modifications: https://github.com/kholia/OSX-KVM

  • I installed the latest QEMU (compiled from source):
    root@itamint:~/# apt install -y gcc make ninja-build libglib2.0-dev libpixman-1-dev ncurses-dev libusb-dev libusb-1.0-0-dev libusbredirparser1 libusbredirhost1 usbutils
    root@itamint:~# git clone https://github.com/qemu/qemu.git
    root@itamint:~#cd qemu
    root@itamint:~/qemu# ./configure –enable-vde –enable-libusb –prefix=/usr/local –target-list=”i386-softmmu x86_64-softmmu”
    root@itamint:~/qemu# make
    root@itamint:~/qemu# make install
    root@itamint:~/qemu# qemu-system-x86_64 –version
    QEMU emulator version 7.2.50 (v7.2.0-2313-g9832009d9d)

  • Install libvirtd/QEMU
    root@itamint:~# apt update -y
    root@itamint:~# apt install qemu-kvm qemu-system qemu-utils python3 python3-pip libvirt-clients libvirt-daemon-system bridge-utils virtinst libvirt-daemon virt-manager cpu-checker -y
    root@itamint:~# usermod -aG root
    root@itamint:~# newgrp kvm
    root@itamint:~# systemctl enable libvirtd
    root@itamint:~# systemctl start libvirtd
    root@itamint:~# virsh net-start default
    root@itamint:~# virsh net-autostart default

    NOTE: this is to make networking config easy. We won’t use the qemu version 6.x installed above. We will use the much newer version we compiled earlier which we installed in /usr/local/bin/ whereas the one installed by the apt command puts qemu in /usr/bin/. To confirm you are using the right qemu, run “which qemu-system-x86_64”

  • Setup networking so that the VM has network access:
    I have put all the networking and firewall rules in a script which can then be executed with a command such as “sudo /home/itababa/setup_firewall.sh”

    itababa@itamint:~/OSX-KVM$ cat /home/itababa/setup_firewall.sh
    #!/usr/bin/bash

    # create a VDE switch and add a subnet range to it. also add an IP address to the switch as it will be the gateway for connected VMs:
    vde_switch -tap vde0 -daemon
    ip link set dev vde0 up
    ip addr add 10.0.2.1/24 dev vde0
    ip route add 10.0.2.0/24 dev vde0
    echo 1 > /proc/sys/net/ipv4/conf/vde0/proxy_arp

    # NOTE: it is possible to setup DHCP on the switch but I will be using static IPs in this guide

    # Internet access to the VMs (execute on the QEMU hypervisor host) where wlp5s0 is the WAN NIC on the Ubuntu QEMU host:
    echo 1 > /proc/sys/net/ipv4/ip_forward
    iptables -t nat -A POSTROUTING -o wlp5s0 -j MASQUERADE
    iptables -I FORWARD 1 -i vde0 -j ACCEPT
    iptables -I FORWARD 1 -o vde0 -m state –state RELATED,ESTABLISHED -j ACCEPT

    # On the QEMU hypervisor (Linux) host, configure the rules for the ports to be forwarded to the OSX VM:
    iptables -A INPUT -p tcp –dport 2222 -j ACCEPT
    iptables -t nat -A PREROUTING -p tcp –dport 2222 -j DNAT –to-destination 10.0.2.100:22
    iptables -A INPUT -p tcp –dport 5905 -j ACCEPT
    iptables -t nat -A PREROUTING -p tcp –dport 5905 -j DNAT –to-destination 10.0.2.100:5900
    # end of networking script

  • “Install” OSX in the VM using OSX-KVM:

itababa@itamint:~/$ sudo echo 1 | sudo tee /sys/module/kvm/parameters/ignore_msrs
itababa@itamint:~/$ sudo cp kvm.conf /etc/modprobe.d/kvm.conf

itababa@itamint:~/$ sudo groupadd kvm
itababa@itamint:~/$ sudo groupadd libvirt
itababa@itamint:~/$ sudo groupadd input

itababa@itamint:~/$ sudo usermod -aG kvm $(whoami)
itababa@itamint:~/$ sudo usermod -aG libvirt $(whoami)
itababa@itamint:~/$ sudo usermod -aG input $(whoami)

itababa@itamint:~/$ cd ~
itababa@itamint:~/$ git clone –depth 1 –recursive https://github.com/kholia/OSX-KVM.git
itababa@itamint:~/$ cd OSX-KVM
itababa@itamint:~/OSX-KVM$ pwd
/home/itababa/OSX-KVM

  • Fetch the Ventura Installer (option 6):
    itababa@itamint:~/OSX-KVM$ ./fetch-macOS-v2.py

  • Convert the downloaded BaseSystem.dmg file into the BaseSystem.img file.
    itababa@itamint:~/OSX-KVM$ dmg2img -i BaseSystem.dmg BaseSystem.img

  • Create a virtual HDD image where macOS will be installed.
    itababa@itamint:~/OSX-KVM$ qemu-img create -f qcow2 mac_hdd_ng.img 128G

  • Edit the OpenCore-Boot.sh script and make the following changes:
    – increase the RAM from 4096MB to 8192MB (ALLOCATED_RAM variable)
    – add avx2 to the CPU flags list (MY_OPTIONS variable)
    – change the CPU from Penryn to Cascadelake-Server-noTSX (only one that didn’t cause random freezing after installation and reboot loop during installation from the several I tested. Unfortunately the VM still freezes/hangs consistently between 10 and 12 minutes after startup.)
    – since we are VDE, comment out the default NIC entry starting with “-netdev user” and replace with our VDE line (see below).
    – Below is how the relevant lines looked in my modified OpenCore-Boot.sh file:
    root@itamint:/home/itababa/OSX-KVM# diff OpenCore-Boot.sh OpenCore-Boot.sh.org
    MY_OPTIONS=”+ssse3,+sse4.2,+popcnt,+avx,+avx2,+aes,+xsave,+xsaveopt,check”
    ALLOCATED_RAM=”8192″ # MiB
    -enable-kvm -m “$ALLOCATED_RAM” -cpu Cascadelake-Server-noTSX,kvm=on,vendor=GenuineIntel,+invtsc,vmware-cpuid-freq=on,”$MY_OPTIONS”
    -device virtio-net-pci,netdev=net0,mac=52:54:00:e6:5d:16 -netdev vde,id=net0
  • Run the OpenCore-Boot.sh script (with admin rights as root or using sudo) to create the VM and start the installation (this starts a VNC session listening on localhost:5901 for example. Use Mobaxterm/VNC or putty tunnel+VNC client to access the VNC session)
    itababa@itamint:~/OSX-KVM$ sudo ./OpenCore-Boot.sh
    VNC server running on 127.0.0.1:5901 (output of executing the OpenCore-Boot.sh script)
    NOTE: without “sudo” or “root” user, you will get an error similar to “Could not open vde: No such file or directory”

  • Connnect to the VNC session (using a VNC client):

  • Go through the installation steps (use Disk Utility to erase the target disk, then install Ventura)

  • Optional: Login into the OSX and enabled “remote management” (VNC) and “remote login” (SSH) (from “System Settings …” – it is no longer called “System Preferences”)

  • Optional: if you enabled “remote management” (VNC) and/or “remote login” (SSH), you can connect directly to the OSX VM via a VNC client (using the IP address of the Linux host and port 5901) and/or via SSH (using the IP address of the Linux host and port 2222). The connections work because we included the relevant forwarding rules in the firewall script (above).

  • Naviate to “System Settings” > Network > Ethernet > “Details…”. Assign a static IP address such as 10.0.2.100 (see the setup_firewall.sh script above) to the OSX with subnet mask 255.255.255.0 and Router 10.0.2.1 (IP address of the VDE switch). Also assign the VDE switch IP address as the DNS Server.

  • Optional: Update OpenCore-Boot.sh and comment out the 2 lines that attaches the installer disk to the VM i.e.,
    # -device ide-hd,bus=sata.3,drive=InstallMedia
    # -drive id=InstallMedia,if=none,file=”$REPO_PATH/BaseSystem.img”,format=raw
  • Optional: shutdown OSX. Modify OpenCore-Boot.sh so that it starts the VM “headless” (i.e., running as a background process):
    Comment out the line “-monitor stdio” and add a line below it with “-daemonize” without the double-quotes.

  • Start the VM in the (OSX-KVM directory) with the command: sudo ./OpenCore-Boot.sh

  • Configure the VM to auto-boots from the OSX disk, run the command at the UEFI shell:
    bcfg boot add 0 FS0:\EFI\boot\BOOT_X64.efi “my_boot”

  • Boot to OSX from the UEFI shell with the command sequence (ENTER key after each one): FS0: > cd EFI > cd BOOT > BOOTx64.efi

  • You can now connect to the OSX VM with VNC (Linux host IP and port 5905 in this example) or SSH (Linux host IP and port 2222 in this example).

NOTE: Several methods to attach a USB stick/device (e.g., one containing TimeMachine backups) to a QEMU VM

Option 1: In Linux Mint (Debian/Ubuntu), attached USB storage gets the group “disk”. So add your normal user to that group.
$ sudo usermod -aG disk itababa
$ newgrp disk

– Then add the device nodename of the USB device to the “args” list for QEMU in the OpenBoot-core.sh file (get the device file from the output of “blkid” or “lsblk” (e.g., /dev/sdb)
-hdc /dev/sdb

– you can also use the following 2x lines (equivalent to the single “-hdc /dev/sdb” line above)
-drive id=USBstick,if=none,file=”/dev/sdb”
-device ide-hd,bus=sata.5,drive=USBstick

Note: in OSX, since the USB is “direct-attached”, it is treated as a HDD. To make the volume appear on the desktop, go to “Finder” (menu) > “Settings”. Check/select/enable the “Hard disks” option.

Option 2: Add the USB device’s “location” to the args list for QEMU in the OpenBoot-core.sh file (get the hostbus and hostaddr from the output of the “lsusb” commmand). You must also change the permission on the device files (e.g., “sudo chmod o+rw /dev/bus/usb/002/*”). This operation does not survive a reboot of the physical host or re-insertion of the USB, so if you want it permanent consider UDEV rules):
-device qemu-xhci,id=usbxhci
-usb -device usb-host,hostbus=2,hostaddr=6

For example, in the “lsusb” output below, “Bus” is “hostbus” and “Device” is “hostaddr”
root@itamint:/home/itababa/OSX-KVM# lsusb
…
Bus 002 Device 006: ID 05dc:a838 Lexar Media, Inc. JumpDrive Tough

IMPORTANT NOTE: to prevent the OSX on QEMU from freezing/hanging (after about 10 mins uptime):
– Go to “System Settings …” > Energy Saver > Conserve battery > “Put hard disks to sleep when possible” disabled.
– Go to “System Settings …” > “Lock Screen” > “Turn display off when inactive” to “Never”
– Also, you MUST login to an account, if you leave the system on the login screen, it will freeze/hang.

* If you restore a time machine back along with “System & Networking”, check afterwards that the two settings above have not reverted to their defaults.

  • NOTE: Take snapshots often (e.g., before using “Migration Assistant” to restore TimeMachine backups from another OSX)
    – take an internal snapshot: qemu-img snapshot -c mac_hdd_ng.ss.030823.img mac_hdd_ng.img
    – list internal snapshots: qemu-img snapshot -l mac_hdd_ng.img
    – revert/restore to a snapshot: qemu-img snapshot -a mac_hdd_ng.ss.030823.img mac_hdd_ng.img
  • NOTE: IF “managed device attestation” is configured on your source OSX from which you restored a Time Machine backup, you may notice ACME (or a similar policy enforcement) app is installed and running.
    IF your source OSX is part of a corporate network, unless you decide to connect to the corporate VPN (unlikely for the purpose of this procedure), ACME won’t be able to validate your OSX VM config and may isolate your restored OSX VM (no networking access). To fix this, temporarily stop the ACME app, or permanently remove it:
    – Use the Utilities > “Activity Monitor” > to stop the ACME process
    – Go to Applications folder and delete (“move to trash”) the ACME app shortcut
    – Go to folder ~/Library/ and delete (“move to trash”) the ACME folder

References:
https://wiki.qemu.org/Documentation/Networking
https://documentation.suse.com/sles/15-SP2/html/SLES-all/cha-qemu-running.html
https://qemu-project.gitlab.io/qemu/system/qemu-cpu-models.html
https://kb.nmsu.edu/page.php?id=99123 (enable remote management i.e., VNC)
https://setapp.com/how-to/how-to-access-your-mac-remotely
https://www.qemu.org/2017/11/22/haxm-usage-windows/
https://qemu-project.gitlab.io/qemu/system/devices/usb.html
https://askubuntu.com/questions/15570/configure-udev-to-change-permissions-on-usb-hid-device/15643
https://unix.stackexchange.com/questions/141255/give-a-specific-user-permissions-to-a-device-without-giving-access-to-other-user
https://blog.programster.org/qemu-img-cheatsheet
https://www.linux-kvm.org/images/6/65/02x08B-Max_Reitz-Backups_with_QEMU.pdf
https://unix.stackexchange.com/questions/530674/qemu-doesnt-respect-the-boot-order-when-booting-with-uefi-ovmf
https://github.com/sickcodes/Docker-OSX
https://www.cyberciti.biz/faq/kvm-forward-ports-to-guests-vm-with-ufw-on-linux/
https://support.apple.com/guide/deployment/managed-device-attestation-dep28afbde6a/web

Upgrading RHEL/CentOS v 7.x to GLIBC version 2.20

Compiling GLIBC-2.x from SOURCE RPM Package:

Background: the latest version of GLIBC from RHEL/CentOS for v7.7 is glibc-2.17. Some software require newer version (2.18 or newer). In the procedure below, I build GLIBC version 2.20 (you can also build version 2.18 using the same procedure).

  • Setup VirtualBox v 7.0.6 e.g., on Windows. So RHEL 7.7 on VirtualBox v7.0.6 used to compile glibc-2.20 or glibc-2.18 source RPM is the working combination.
    Note1: compiling/rebuilding the glibc-2.18 from source rpm consistently crashed VB v 7.0.4 on Windows)

  • Setup RHEL 7.7 from the DVD in a VM

  • Configure the Installation DVD (attached to the VM and mounted on /mnt) as a repo:
    [root@rhel77c ~]# mount /dev/cdrom /mnt
    [root@rhel77c ~]# cp /mnt/media.repo /etc/yum.repos.d/
    [root@rhel77c ~]#
    [root@rhel77c ~]# vi /etc/yum.repos.d/media.repo
    [root@rhel77c ~]#
    [root@rhel77c ~]# cat /etc/yum.repos.d/media.repo
    [InstallMedia]
    name=Red Hat Enterprise Linux 7.7
    mediaid=1563892373.442998
    metadata_expire=-1
    gpgcheck=0
    cost=500
    enabled=1
    baseurl=file:///mnt/
    gpgkey=file:///etc/pki/rpm-gpg/RPM-GPG-KEY-redhat-release

  • Install required packages:
    [root@rhel77c ~]# yum install -y yum-utils gcc wget rpm-build
    [root@rhel77c ~]# wget https://dl.fedoraproject.org/pub/epel/epel-release-latest-7.noarch.rpm
    [root@rhel77c ~]# yum localinstall -y epel-release-latest-7.noarch.rpm
    [root@rhel77c ~]# yum install -y libpng-devel zlib-devel texinfo libselinux-devel audit-libs-devel libcap-devel nss-devel systemtap-sdt-devel
    [root@rhel77c ~]# wget http://mirror.centos.org/centos/7/os/x86_64/Packages/gd-2.0.35-26.el7.x86_64.rpm
    [root@rhel77c ~]# wget http://mirror.centos.org/centos/7/os/x86_64/Packages/gd-devel-2.0.35-26.el7.x86_64.rpm
    [root@rhel77c ~]# wget http://mirror.centos.org/centos/7/os/x86_64/Packages/libstdc++-4.8.5-44.el7.x86_64.rpm
    [root@rhel77c ~]# wget http://mirror.centos.org/centos/7/os/x86_64/Packages/libstdc++-static-4.8.5-44.el7.x86_64.rpm

– Make sure the DVD ISO is attached to the VM and mounted as yum will install dependencies from it:
      [root@rhel77c ~]# mount /dev/cdrom /mnt

  • Install the packages that were just downloaded (above):
    [root@rhel77c ~]# yum install -y gd* libstdc*

  • Download the glibc-2.x source RPM and rebuild it:
    [root@rhel77c ~]# wget ftp://ftp.pbone.net/mirror/archive.fedoraproject.org/fedora/linux/updates/21/SRPMS/g/glibc-2.20-8.fc21.src.rpm
    [root@rhel77c ~]# rpmbuild –rebuild glibc-2.20-8.fc21.src.rpm

  • Some of the Generated RPMs:
    /root/rpmbuild/RPMS/x86_64/glibc-2.20-8.el7.x86_64.rpm
    /root/rpmbuild/RPMS/x86_64/glibc-devel-2.20-8.el7.x86_64.rpm
    /root/rpmbuild/RPMS/x86_64/glibc-headers-2.20-8.el7.x86_64.rpm
    /root/rpmbuild/RPMS/x86_64/glibc-common-2.20-8.el7.x86_64.rpm

  • Testing: Upgrade the system’s GLIBC or transfer the files to another system to upgrade that system’s GLIBC version e.g.,:
    [root@rhel77c2 ~]# rpm -qa | grep glibc
    glibc-2.17-292.el7.x86_64
    glibc-devel-2.17-292.el7.x86_64
    glibc-common-2.17-292.el7.x86_64
    glibc-headers-2.17-292.el7.x86_64
    [root@rhel77c2 ~]#
    [root@rhel77c2 ~]# yum localinstall -y glibc-2.20-8.el7.x86_64.rpm glibc-common-2.20-8.el7.x86_64.rpm glibc-devel-2.20-8.el7.x86_64.rpm glibc-headers-2.20-8.el7.x86_64.rpm
    [root@rhel77c2 ~]#
    [root@rhel77c2 ~]# rpm -qa | grep glibc
    glibc-common-2.20-8.el7.x86_64
    glibc-2.20-8.el7.x86_64
    glibc-devel-2.20-8.el7.x86_64
    glibc-headers-2.20-8.el7.x86_64
    [root@rhel77c2 ~]#


Reference links:
https://github.com/sclorg/centos-release-scl
https://centos.pkgs.org/7/centos-updates-x86_64/
ftp://ftp.pbone.net/mirror/archive.fedoraproject.org/fedora/linux/updates/21/SRPMS/g/glibc-2.20-8.fc21.src.rpm
ftp://ftp.pbone.net/mirror/archive.fedoraproject.org/fedora/linux/releases/20/Fedora/source/SRPMS/g/glibc-2.18-11.fc20.src.rpm


EXTRAS:
————————————-

Installing GCC v 7.3.1/8.3.1/9.3.1 on RHEL/CENTOS v 7.x via the SCL (Software Collection) repository.
In order to gain access to SCLs for CentOS, you need to install the CentOS Linux Software Collections release file. It is part of the CentOS Extras repository (x86_64 only).

NOTE: RHEL v7.7 comes with gcc version 4.8.5. If you need a newer gcc version, you can install GCC versions 7.3.1/8.3.1/9.3.1 via the SCL package “devtoolset-7” or “devtoolset-8” or “devtoolset-9”.

  • On a CentOS system, enable the SCL repo with the command “yum install -y centos-release-scl”. On a RHEL system, enable the SCL repo with the command:
    [root@rhel77c ~]# yum install -y http://mirror.centos.org/centos/7/extras/x86_64/Packages/centos-release-scl-rh-2-3.el7.centos.noarch.rpm

  • Install devtoolset-7 and/or devtoolset-8:
    [root@rhel77c ~]# yum install -y devtoolset-7
    [root@rhel77c ~]# yum install -y devtoolset-8

  • To install devtoolset-9:
    [root@rhel77c ~]# yum install -y http://mirror.centos.org/centos/7/os/x86_64/Packages/source-highlight-3.1.6-6.el7.x86_64.rpm
    [root@rhel77c ~]# yum install -y devtoolset-9

NOTE: devtoolset-7/8/9 files are installed in /opt/rh/devtoolset-7/ (or /opt/rh/devtoolset-8/ or /opt/rh/devtoolset-9/ as applicable). So GCC compiler and supporting binaries will be in /opt/rh/devtoolset-7/root/usr/bin/ (or /opt/rh/devtoolset-8/root/usr/bin/ or /opt/rh/devtoolset-9/root/usr/bin/ as applicable).

  • In order to use the compiler that comes with the devtoolset, temporarily or permanently adjust your PATH variable so that it is found first before the system’s default gcc version 4.8.5 e.g.,
    [root@rhel77c ~]# export PATH=/opt/rh/devtoolset-7/root/usr/bin:$PATH
    [root@rhel77c ~]# export LD_LIBRARY_PATH=/opt/rh/devtoolset-7/root/usr/lib64/
    [root@rhel77c ~]# gcc –version